How to Release Pressure in Screen Cooling System of Slash

Updated on January 13, 2020 in Hardware
14 on October 29, 2018

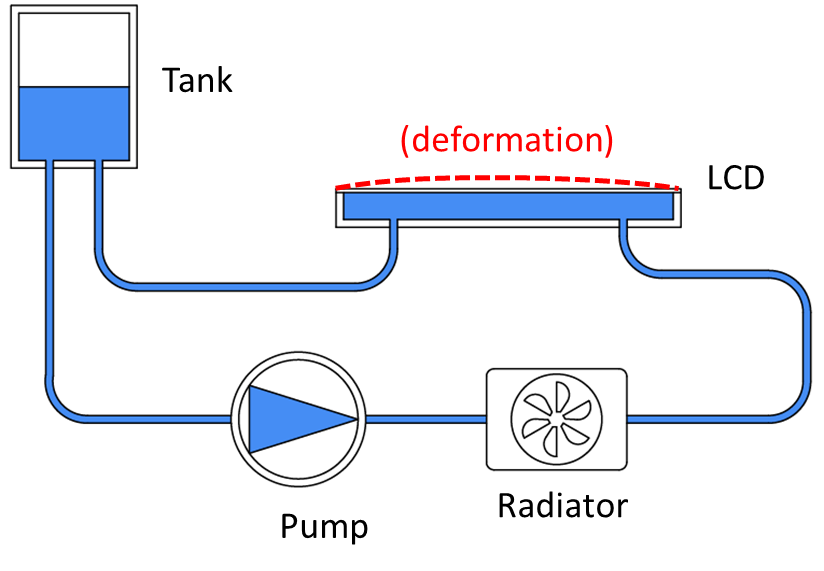
The LCD screen is at the highest level of the entire liquid cooling system. After the first few prints, the coolant heats up and may cause deformation of the LCD screen. If deformation takes place, please use the pressure release cap on the coolant tank to rebalance the pressure.


Tools Required


1. Standard Ruler


2. Feeler Gauge   


3. Wrench


Note

1. For the user’s safety, please power off the printer before this operation!


2. Check the LCD every two weeks as advised.
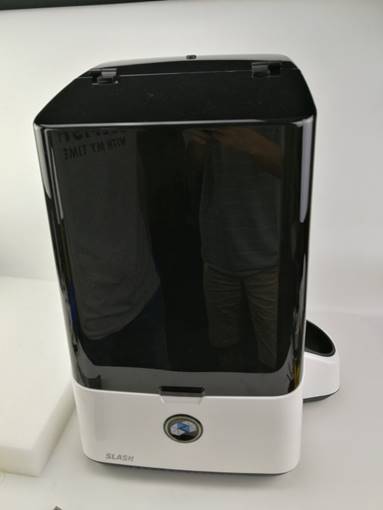
 

1Put the printer on table and open the cover
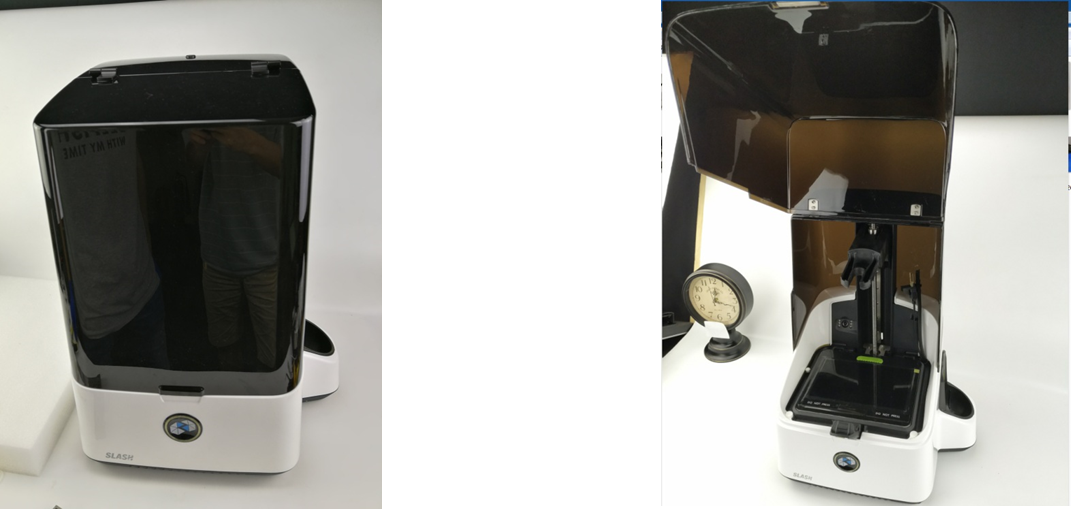
 

2Check if the pressure is normal in the screen cooling system

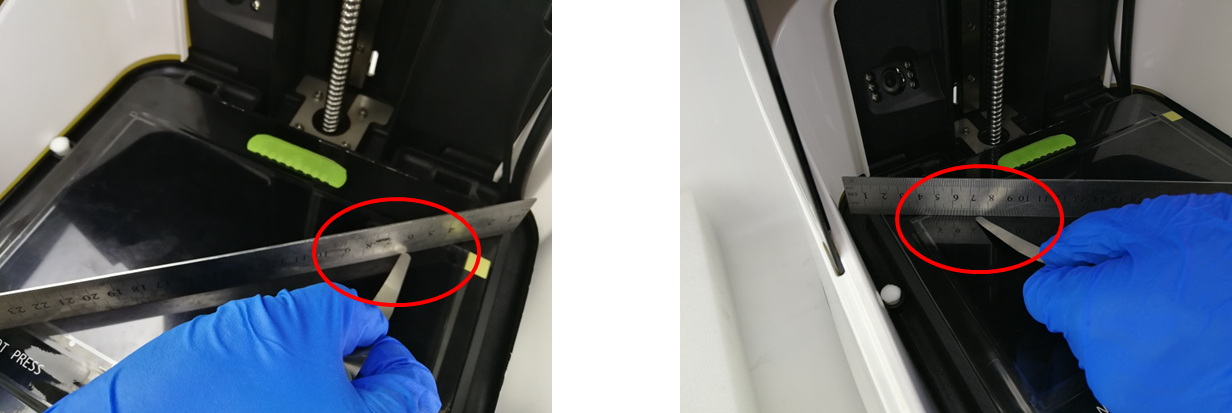
If there is no gap between the ruler and the screen, it is NOT necessary to release the pressure.

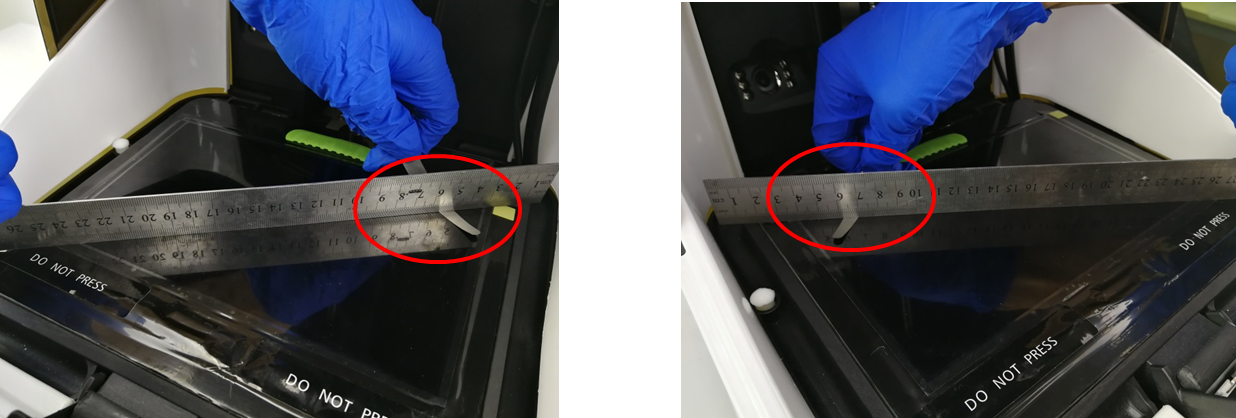
If there is gap between the ruler and the screen, it is necessary to release the pressure.

3Put the printer sideways

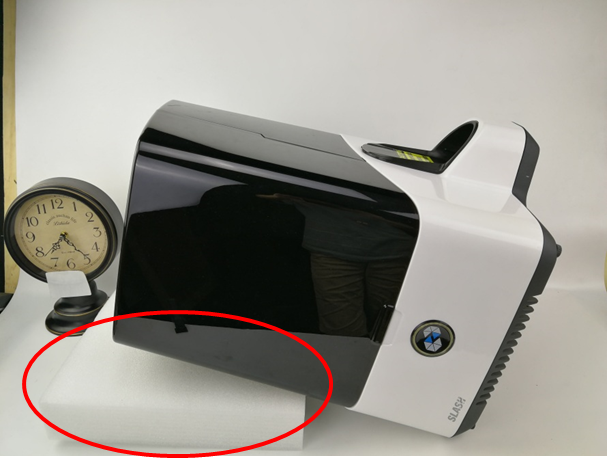
Lay protections to prevent possible damage to the printer
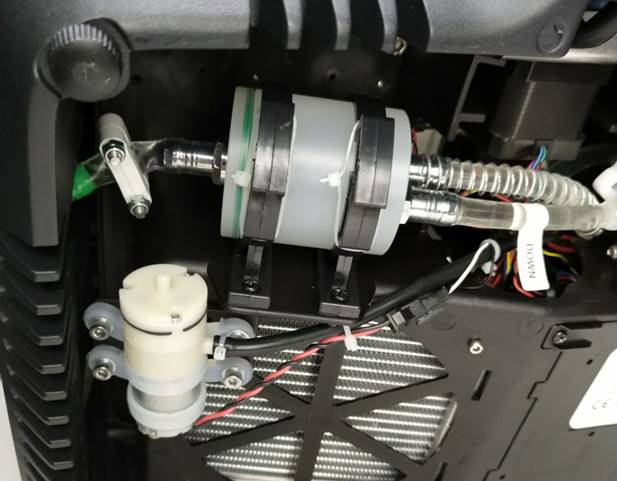
4Remove the ties and push out the coolant tank

5Take off the coolant tank

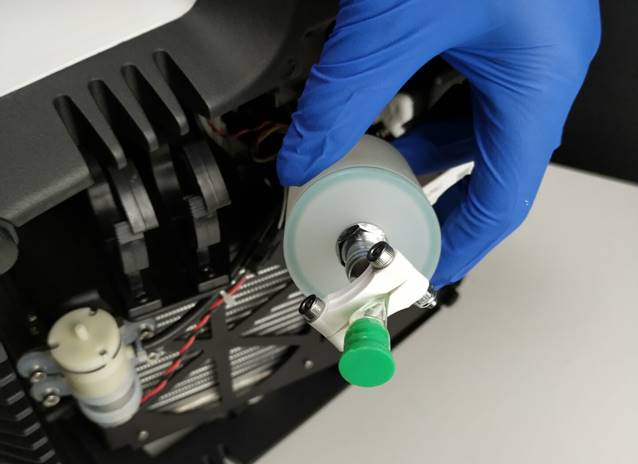
Take off the coolant tank from the holder
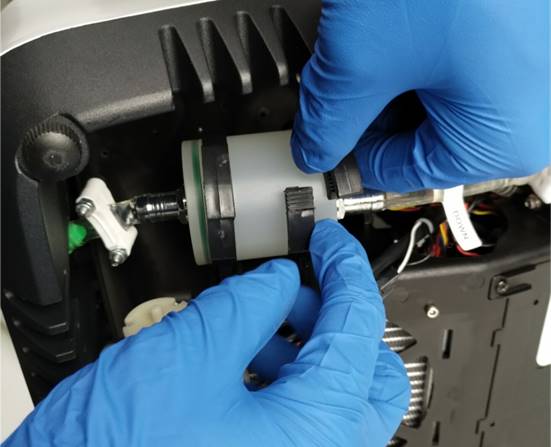
6Remove the joint of the coolant tank to release the pressure

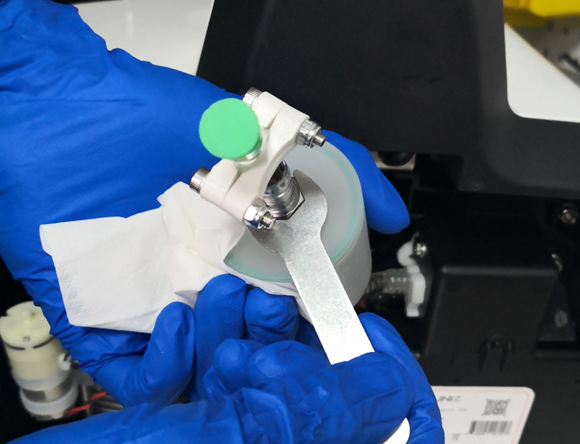
Prepare some tissue to wipe off the coolant which may spill out of the tank; do not keep any electronic device near the printer

7Squeeze the tube and tighten the joint

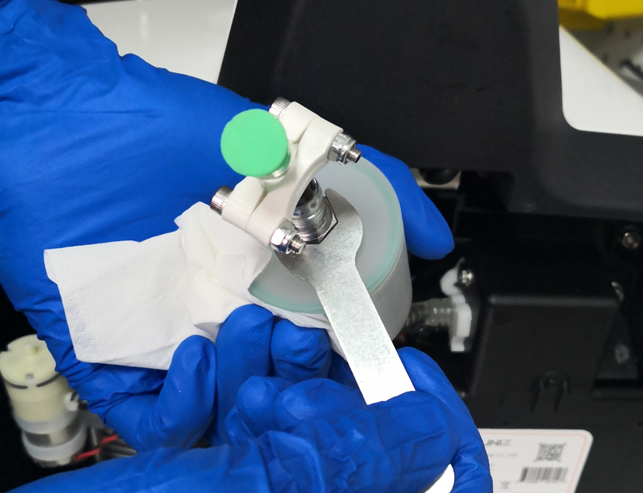
Tighten with suitable strength

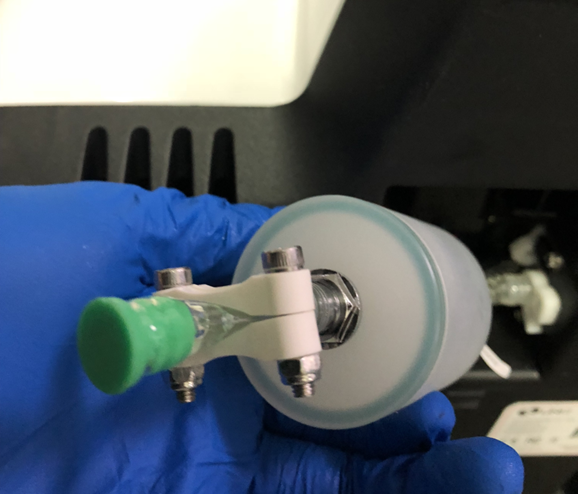
Wipe clean the coolant tank and the tubes

8Put back the coolant tank to the holder

Press tight the holder as the arrows show in the picture; make sure they are centered and match each other effectively

9Put back the nylon ties

Fixate the holder with nylon ties

10 Put the printer upright

11The pressure in the screen cooling system has been normal

Test with feeler gauge and there is no gap

12Finished

 
  • Liked by
Reply
3 on October 31, 2018

Are you kidding? Asking your customers to strip down their machine for a faulty design is just plain irresponsible. You need to do what other professional manufacturers do and issue a replacement part with a pressure release valve or recall the defective machine and replace the parts. 

on November 1, 2018

While I was unaware that this was a problem (maybe the pressure is a cause of leaks too)? I am grateful to Uniz for providing a solution. I agree that a pressure release valve would be a better solution for customers. Even an automatic one is doable.. I hope the above becomes a temporary fix and the valves are sent out! Now I have to order a feeler gauge and metal ruler as my build platform doesn’t want to print at the rear left corner… ?

on January 30, 2019

Agreed with @kurt, this is yet another example of one of UNIZ’s many design oversights which must be addressed. I totally just wasted a full bottle of resin before realizing this is likely what is causing my recent print issues…

@UNIZ, please address this issue with a pressure release valve that you can provide your customers with, or replace our printers with ones that have this issue fixed!

on July 2, 2019

guys, has anyone of your folks tried that? 

I wonder how long the machine can last if we just do not tinkle with the coolant pressure. 

Show more replies
  • Liked by
Reply
Cancel
0 on November 10, 2018

So.. I have followed the above procedure, here are the before and after shots. It looks better but not perfect. My question is that after loosing about 5ml of zOil will I need to replace the lost oil eventually after several fixes or will a vacume of air develop instead and so just release the air pressure as long as the reservoir has some oil? Before After

  • Liked by
Reply
Cancel
4 on November 16, 2018

I have the same issue 🙁 And I thought the pressure releasing will be the solution to have nice flat display. So, do I have a chance to print without worries? Curvy display means no sticking at higher resolutions. Am I wrong? What to do now???

on November 17, 2018

I found that the above procedure wasn’t the full solution for me. I still had problems with a large print not sticking to the corners of the build platform. The solution was to set the z-axis using a sheet of standard A4 paper as appose to with the vat in place. This gave me a tighter fit to the LCD. After doing so I noticed that the first few layers in the centre of the build plate were squashed and were properly formed towards the corners backing up my theory that the LCD was still uneven including the build plate a little. Also I always use 0.01 layer height for the first three burn in layers to maximise adhesion to the build plate. Hope this helps! ☺

on November 19, 2018

Thats clever. But 0.1mm did you mean? Cause 0.01 is 10 microns and in this case you will have the non-sticking issue again. Am I right?

on November 20, 2018

I use 10 microns, with default LED power. This means thin layers will over cure and stick more solidly!

on July 2, 2019

Hi Stevie, thanks a lot, I am really concerned how often we have to do this kind of adjustment, if we must do so after less than 50 prints, I think the current design must be fixed in order for the machine to perform, any thoughts? I am using some conventional LCD printers, they are rock solid and usually it takes 3 months or so for us to change the LCD screens. The coolant pressure + curved LCD screen + re calibration would take time away from users.

Show more replies
  • Liked by
Reply
Cancel
0 on January 14, 2019

If you will buy PERSONAL ALARM ,actually, I was buying here – https://sospersonalalarm.com/  you will not need to repair it , just use it and enjoy! 


  • Liked by
Reply
Cancel
1 on February 21, 2019

Well well…..I wish the Uniz engineers offer courses so I can use my machine. I have never heard of consumers of other machines having to do this level of maintenance!! get 90% fail rate from my prints. due to not sticking to build, failed to attach prints to scaffolds. And geometry of prints going haywire. This I was informed that it was the coolant board needed upgrading to the new one. So I have bought new coolant and lcd board and replaced two bottle or resin I wasted for 467 euro. And have to get a video translated from Chinese to English so I can work out how to replace. As Unize do not supply the information  in English.  

Now I have found out that still will not solve the problem as I have to self regulate the coolant. Every two weeks!!!

Well here is hoping they do another kickstarter so people can try buying a machine that works!!!! Because I would love to give them another load of money!!

SteveRich…see you post on Uniz site……Is it true there is no longer a Uniz users facebook page?? Is there a public forum where I can freely inform perspective buyers NOT to buy a Uniz machine?

on February 22, 2019

Hi Ian, sorry for inconvenience caused. You could send your problem to support@uniz.com. Our support team will help to resolve your problem.

Show more replies
  • Liked by
Reply
Cancel
0 on January 13, 2020

In some cases it is difficult to repeat the process, as it is described above. regards,  http://resumeperk.com/blog/write-a-winning-it-resume-tips-from-resume-writing-website 

  • Liked by
Reply
Cancel
Loading more replies