Hey, I just read the help and didnt find the explanation for such
Here we have menus of the resin which is identical (almost) why do I have it and which one should I use?
It it that I can change the resin in the middle of the printing?!
Thanks


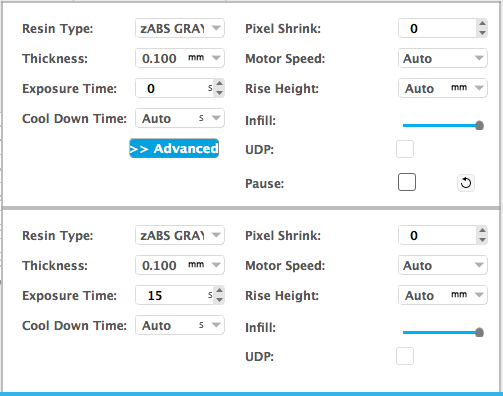
The two separate menus are for different regions of the print by layer. By default, there are 2 regions: the first 3 layers, and then all the rest. You can add regions by double-clicking on the bar to the right of the model view, and you can drag them up and down. The utility here is to adjust settings for various regions of your print. Example: cure base layers longer and with lower resolution, and cure model layers less and with higher resolution. There are a lot of reasons why you’d do this. No matter how many regions you have, you’ll just see the two menus, because you must always have an interface (between regions) selected. So the bottom window always represents the region below the interface, and the top window represents the region above the interface.

Steven meant they will lock it maybe in the future. And just the simple explanation for your first question. Top menu is for layers above. Bottom menu is for layers below. I had also problem to understand it when I saw it for the first time. Its pretty easy, but still explanation in the manual could be better.


witch one of those menus is for the 3 first layers? Because i have problems with the models they don’t have enough grip ..and i wanna change the settings to try to have better grip.
